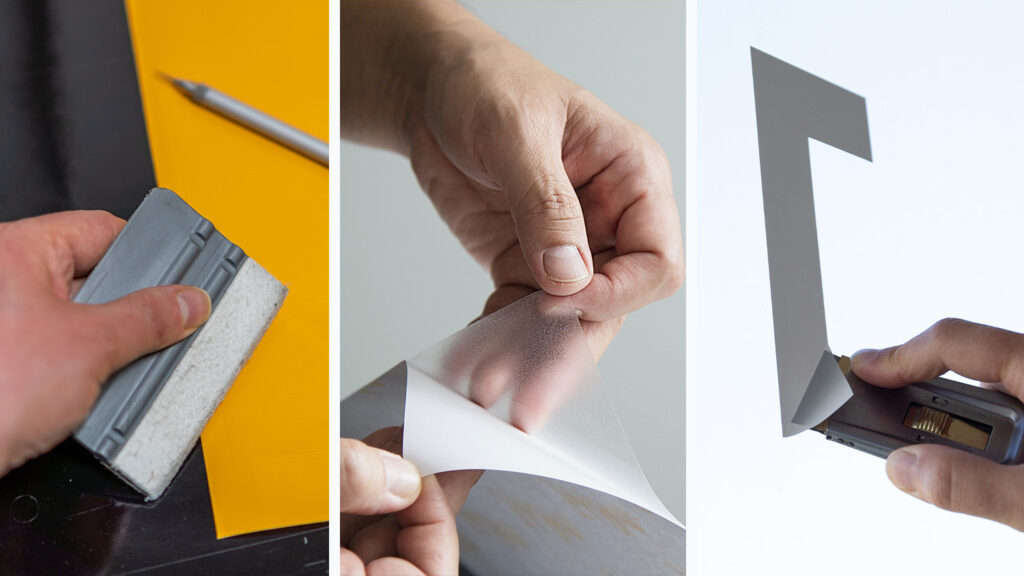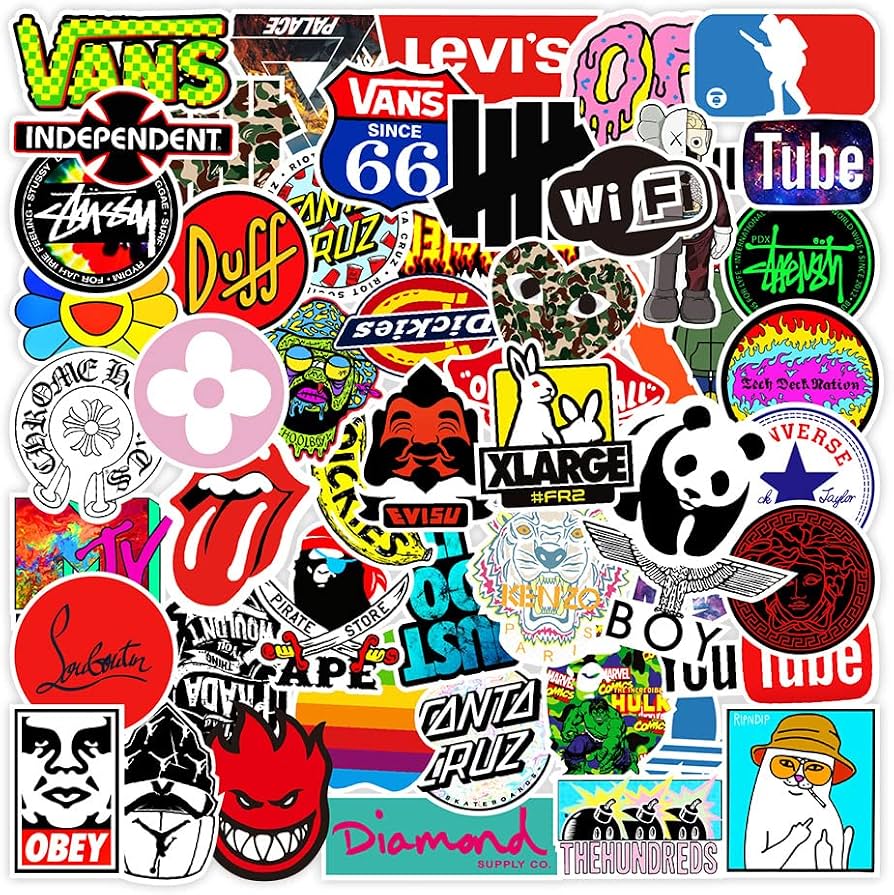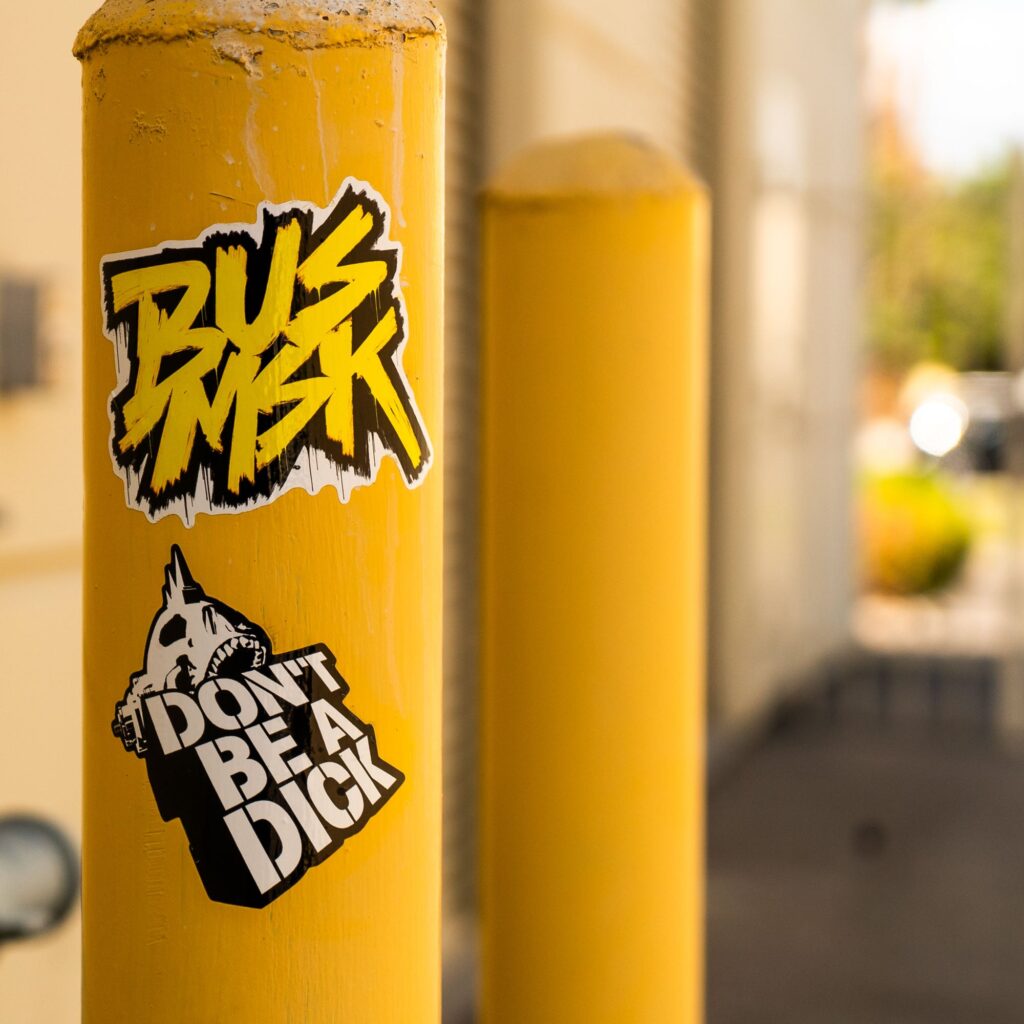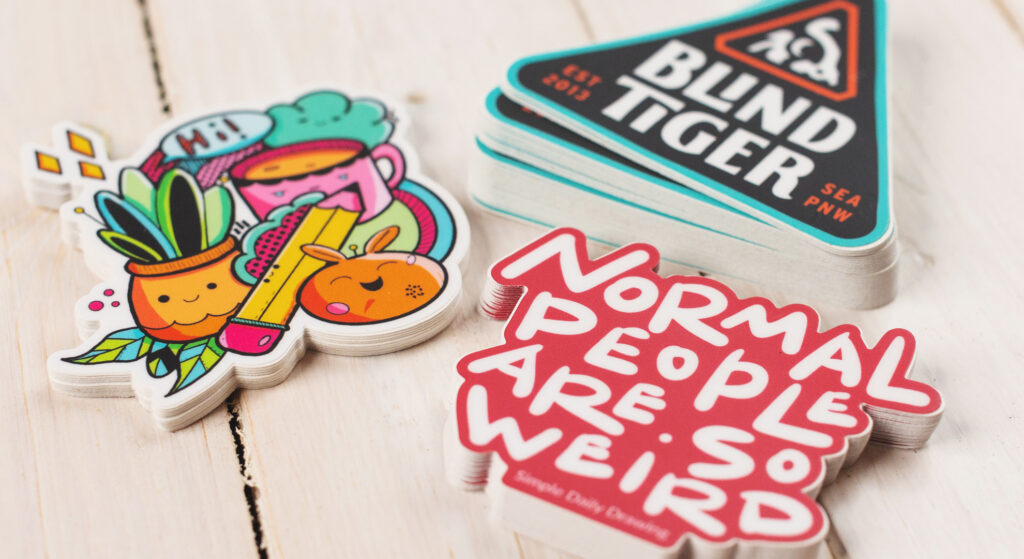
Posted on

Matte vs Glossy Stickers: Which Finish Fits Your Design?

Matte vs Glossy Stickers: Which Finish Fits Your Design?

What Is the Difference Between Matte and Glossy Stickers?

The main difference is how the surface interacts with light.

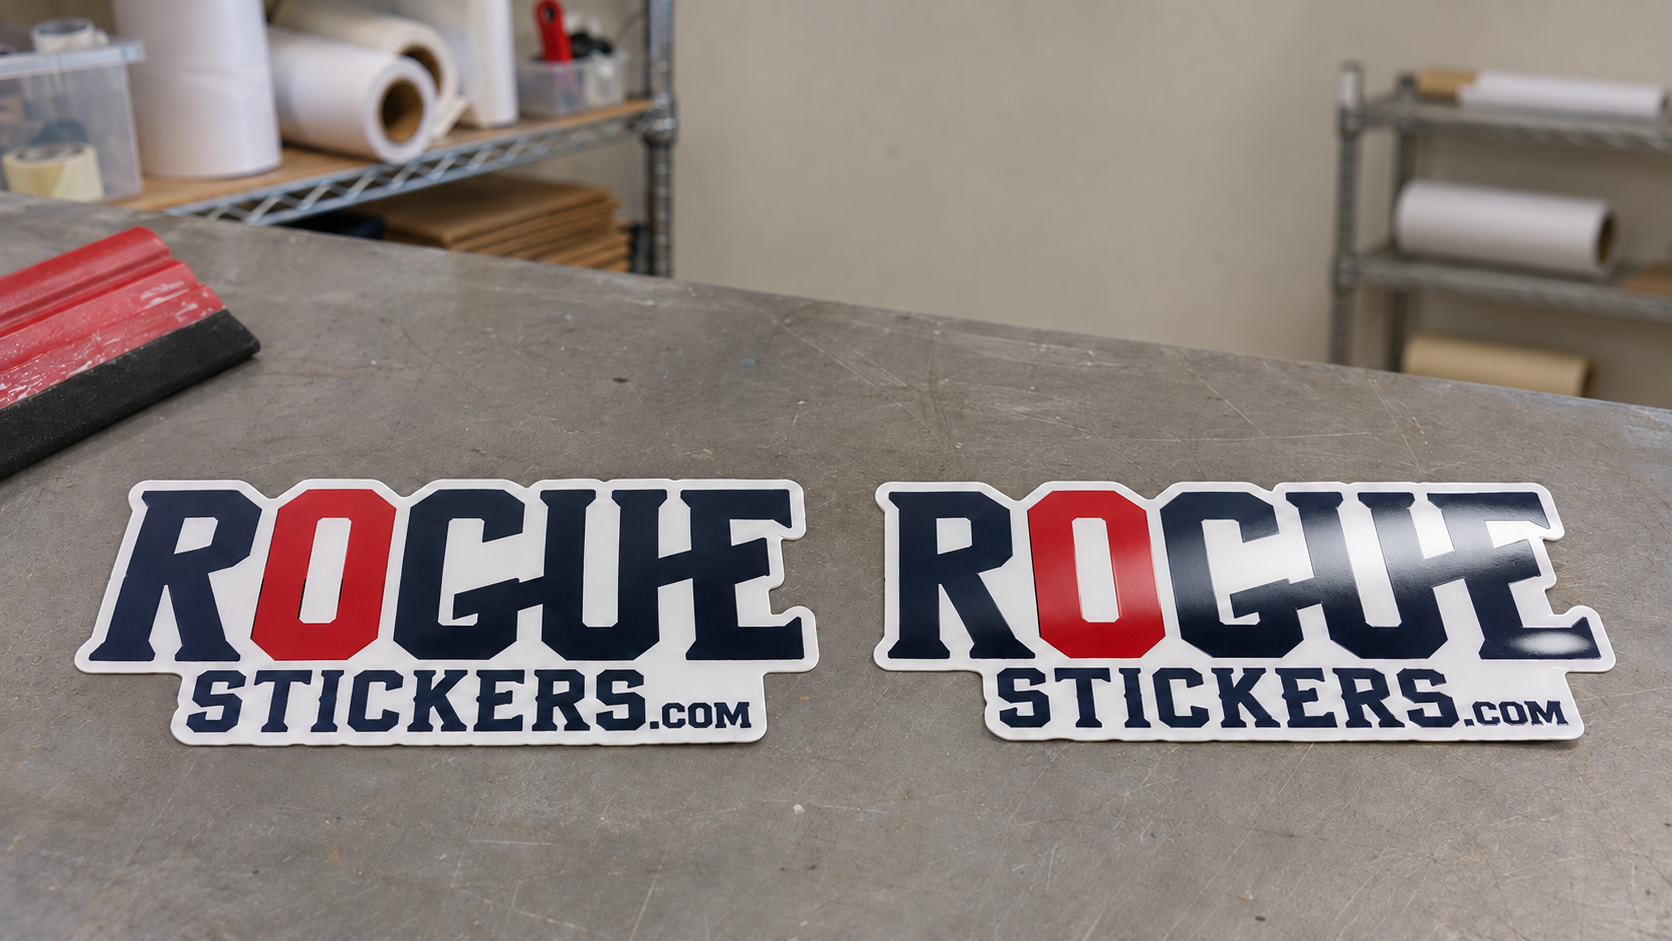
Glossy stickers have a smooth, reflective finish. Light bounces from the surface, creating noticeable shine. This can make colors and dark areas appear richer.

Matte stickers diffuse more light. The surface has little visible shine, which creates a softer and more understated appearance.

The printed artwork may be identical, but the finish can change how the design feels. Gloss tends to look energetic and bright. Matte often feels calm, modern, or refined.

Neither option is automatically better. The right choice depends on the artwork, placement, lighting, and impression you want to create.

Do Colors Look Better on Glossy Stickers?

Gloss can make saturated colors appear deeper and more vivid. Bright illustrations, bold logos, photographs, and artwork with strong contrast can benefit from that extra visual energy.

This does not mean matte produces poor color. Matte simply creates a softer presentation. Muted palettes, vintage artwork, natural colors, and minimal branding may look more intentional without a reflective surface.

Ask what the artwork is supposed to communicate.

If the design should feel loud, colorful, and energetic, gloss may support that goal. If it should feel subtle, warm, or sophisticated, matte may be a better match.

Does Matte Reduce Glare?

Yes. Matte surfaces reflect less concentrated light than glossy surfaces.

That can make matte stickers easier to view beneath strong overhead lighting, near windows, or in photographs. Small text and fine details may also remain easier to see when reflections are reduced.

Glossy stickers can develop bright highlights under direct light. The artwork remains printed beneath the finish, but glare may temporarily hide part of the design from certain angles.

Consider the final environment. A sticker displayed beneath retail lighting may benefit from reduced reflection, while a colorful giveaway sticker may benefit more from glossy shine.

Which Finish Shows More Fingerprints?

Glossy surfaces tend to make fingerprints and smudges more noticeable, especially on dark artwork.

Matte finishes are usually more forgiving because their surface scatters light and hides small marks more effectively.

This difference matters for stickers that will be touched often, such as:

• Laptop stickers

• Equipment labels

• Product containers

• Retail displays

• Reusable packaging

• Control panel graphics

A glossy sticker can still be cleaned, but it may require more frequent wiping if appearance must remain spotless.

Which Finish Is Better for Product Packaging?

Both finishes can work well on packaging.

Gloss may suit bright food packaging, colorful promotional boxes, beverage branding, and products designed to attract attention on a shelf.

Matte may suit cosmetics, candles, specialty goods, natural products, premium boxes, and brands with a more restrained visual style.

The surrounding package should influence the decision. A glossy sticker can provide contrast on a matte box. A matte sticker can soften the appearance of a shiny container.

Do not choose the finish separately from the package. Place a printed sample on the actual container and evaluate the complete presentation under realistic lighting.

Which Finish Photographs Better?

Matte is generally easier to photograph because it produces less glare.

Glossy stickers can still look excellent in photographs, but the photographer may need to adjust the light, camera angle, and position of the product to control reflections.

This matters for businesses that rely heavily on:

• Online product listings

• Social media images

• Website photography

• Printed catalogs

• Restaurant menus

• Promotional materials

If the sticker will appear frequently in product photography, test both finishes with the lighting setup normally used by the business.

Is Matte Better for Small Text?

Matte can make small text easier to view in bright conditions because there is less glare crossing the letters.

However, finish cannot rescue text that is already too small, too thin, or too close in color to its background. Readability still depends on font choice, size, spacing, contrast, and printed dimensions.

View the artwork at its actual intended size before approving it. If important instructions, contact information, or ingredients are difficult to read on screen at physical size, revise the design instead of relying on the finish.

Which Finish Is Better for Photographs?

Gloss often gives photographs stronger contrast and richer looking dark areas. Images with bright color, polished products, or dramatic lighting can look especially vivid.

Matte can work well for portraits, lifestyle photography, soft natural scenes, and images where reflection would be distracting.

The result also depends on the quality of the original file. A finish cannot correct a blurry, compressed, dark, or low resolution photograph.

Review image quality during proofing and make sure the photograph remains clear at the finished sticker size.

Does the Finish Determine Sticker Durability?

Not by itself.

A sticker is a complete construction that can include printable material, adhesive, ink, and a protective layer. Its performance depends on all of those components, along with the application surface and environment.

Do not assume that every glossy sticker is suitable for outdoor use or that every matte sticker has the same resistance to moisture and abrasion.

If durability matters, ask specific questions:

• Is the sticker intended for indoor or outdoor use?

• Is a protective laminate included?

• Is the material suitable for moisture?

• Is the adhesive appropriate for the surface?

• Will the sticker receive direct sunlight?

• Will it be cleaned or handled frequently?

Choose the construction for the environment first. Then choose matte or gloss for appearance.

Which Finish Works Better for Texas Businesses?

Texas businesses should consider where the sticker will be seen.

Austin restaurants and retailers may use glossy stickers to bring strong color to packaging, cups, event materials, and promotional giveaways. Matte stickers may be useful where overhead lighting, window glare, photography, or frequent handling affects visibility.

Outdoor heat and sunlight should not be evaluated through finish alone. The vinyl, ink, laminate, adhesive, placement, and exposure all influence performance.

Tell the printer where the sticker will be used instead of simply asking for matte or gloss.

How Can You Choose With Confidence?

Start with the artwork and its purpose.

Choose gloss when you want:

• Strong shine

• Bold color presentation

• Rich looking dark areas

• A bright promotional appearance

Choose matte when you want:

• Reduced glare

• A softer visual style

• Easier product photography

• Less visible fingerprints

• A subtle or refined presentation

When possible, compare physical samples. Computer screens cannot accurately reproduce the way real light moves across matte and glossy surfaces.

The best finish is the one that supports the artwork, surface, lighting, and brand instead of competing with them.

Visit Rogue Stickers to explore custom sticker options for your business, packaging, event, or organization.

Compare sticker styles and materials and read our surface preparation guide. For questions about a specific application, contact Rogue Stickers before ordering.
Posted on

Why Won’t My Sticker Stick? A Guide to Surfaces and Proper Application

Why Won’t My Sticker Stick? A Guide to Surfaces and Proper Application

Why Won’t My Sticker Stick?

When a vinyl sticker will not stay down, it is easy to assume that the adhesive is defective. Sometimes that may be the issue, but many adhesion problems begin with the surface rather than the sticker.

Dust, grease, wax, moisture, texture, cold temperatures, and certain plastics can all interfere with the bond. Even a surface that looks clean may contain residue that prevents the adhesive from making full contact.

Understanding the surface before applying or ordering stickers can prevent lifting edges, bubbles, and premature failure.

What Surfaces Do Vinyl Stickers Stick to Best?

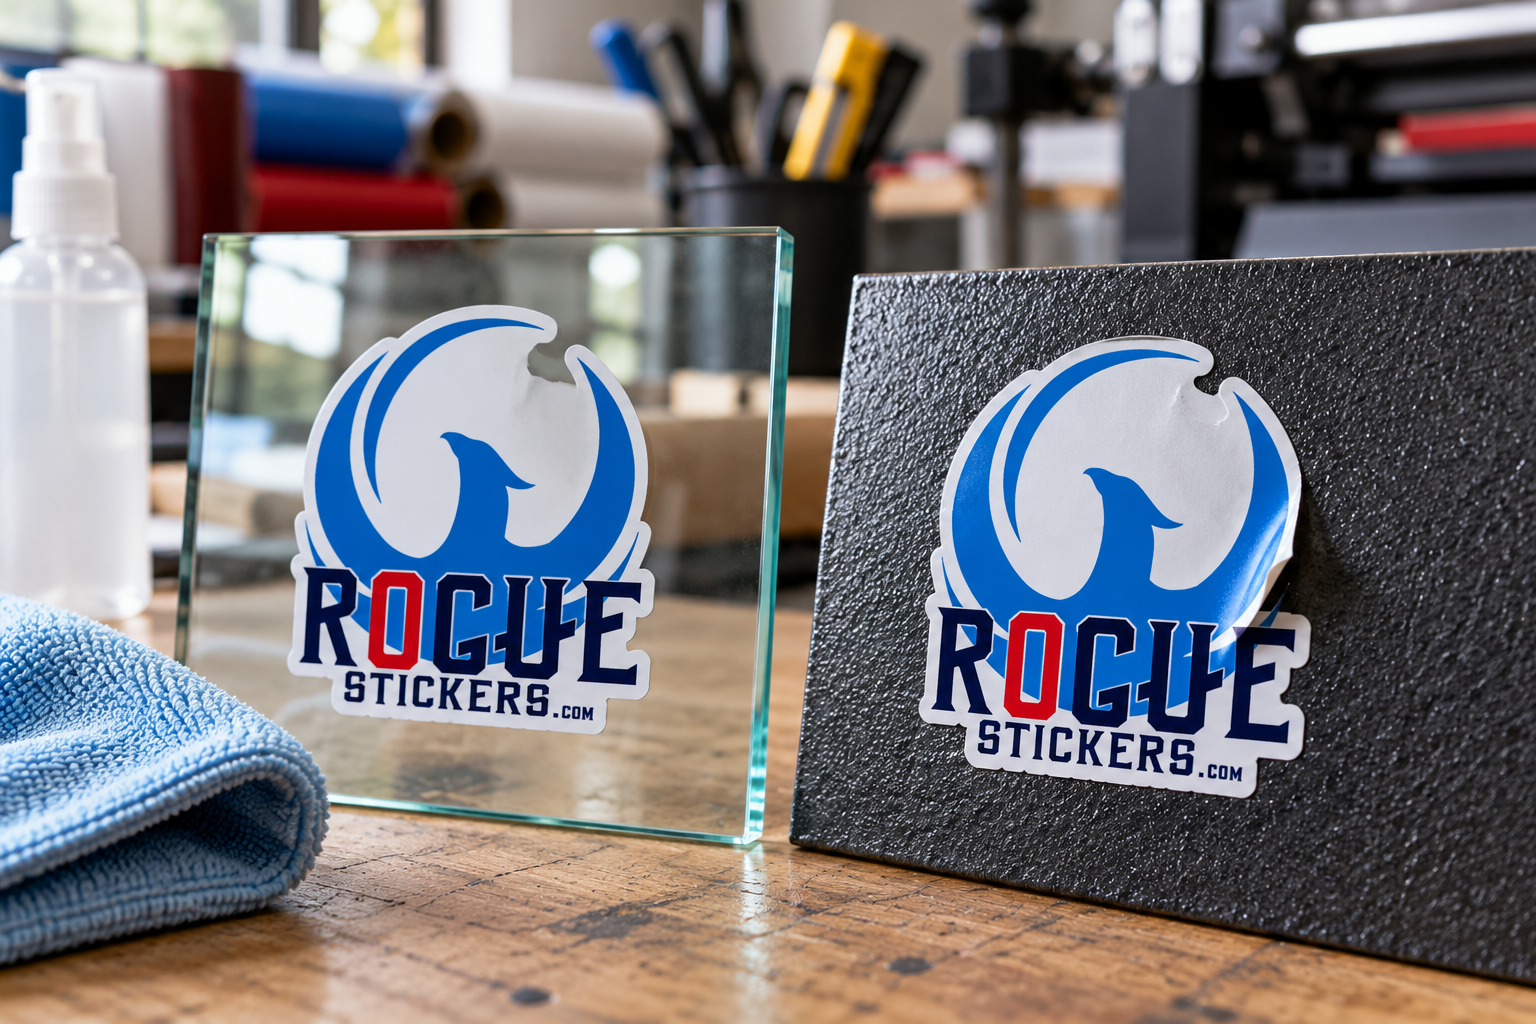
Vinyl stickers generally perform best on surfaces that are smooth, clean, dry, and nonporous.

Common examples include:

• Glass

• Smooth painted metal

• Stainless steel

• Aluminum

• Finished plastic

• Smooth sealed surfaces

• Clean vehicle windows

• Smooth product packaging

The adhesive needs direct contact with the surface. Smooth materials allow more of the adhesive to touch the object, creating a better opportunity for the bond to develop.

A sticker applied to a clean glass window will usually have much more adhesive contact than the same sticker applied to a rough brick wall.

Why Do Stickers Struggle on Textured Surfaces?

Texture creates small peaks and valleys between the adhesive and the surface. The sticker may touch the raised areas while leaving gaps over the lower areas.

This reduces the total contact between the adhesive and the object. The sticker may initially appear secure but begin lifting around the edges later.

Common difficult surfaces include:

• Textured walls

• Brick

• Concrete

• Rough wood

• Fabric

• Canvas

• Heavily textured powder coating

• Uneven plastic

Applying more pressure may help on mild texture, but it cannot always overcome a surface that is too rough for the adhesive.

If the intended surface is unfamiliar, testing one sticker before ordering or applying a large quantity is the safest approach.

Why Do Stickers Have Trouble Sticking to Silicone and Rubber?

Silicone, rubber, and some plastics have low surface energy. In simple terms, this means an adhesive may have difficulty spreading across and bonding to the surface.

Polyethylene and polypropylene can also present adhesion challenges, depending on the specific material and adhesive. These plastics are used in many containers, coolers, storage bins, and molded products.

A sticker that bonds well to glass may not perform the same way on a silicone bottle sleeve or flexible plastic container. The appearance of the surface alone does not reveal how well an adhesive will work.

When the material is unknown, apply a sample and observe it under the same conditions in which the finished sticker will be used.

Can Dirt or Oil Stop a Sticker From Sticking?

Yes. Dust, fingerprints, grease, wax, polish, and other contaminants can create a barrier between the sticker and the surface.

This is common with items that are frequently handled, including:

• Drinkware

• Coolers

• Toolboxes

• Helmets

• Vehicle surfaces

• Laptops

• Product containers

Cleaning the surface is one of the most important steps in sticker application.

Use a cleaning method that is safe for the specific material. Some surfaces can be damaged or discolored by strong cleaners. Products that leave behind wax, fragrance, silicone, or polish can also interfere with adhesion.

After cleaning, allow the surface to dry completely before applying the sticker.

How Should You Prepare a Surface for a Vinyl Sticker?

Follow these steps before application:

  1. Confirm that the surface is suitable for adhesive vinyl.
  2. Remove visible dust, dirt, grease, and residue.
  3. Use a cleaner that is safe for the material.
  4. Dry the surface completely with a clean cloth.
  5. Avoid touching the cleaned area with your fingers.
  6. Position the sticker before removing the entire backing.
  7. Apply steady pressure across the complete design.
  8. Pay particular attention to corners, narrow sections, and outer edges.

Pressure sensitive adhesives need pressure to establish contact. Simply placing a sticker on a surface without pressing it firmly may leave weak areas beneath the vinyl.

Does Temperature Affect Sticker Adhesion?

Temperature can affect both the sticker adhesive and the application surface.

When conditions are too cold, an adhesive may become less flexible and may not spread across the surface effectively. Excessive heat can also make installation more difficult by causing the vinyl to become soft or stretch.

The sticker, surface, and surrounding air should be within the application range recommended for the specific material. Because that range varies between products, there is no single temperature that applies to every sticker.

This is especially important in Texas. A metal sign, vehicle window, or outdoor container sitting in direct summer sunlight may become much hotter than the surrounding air. During winter, outdoor surfaces may also be too cold for dependable installation.

Whenever possible, apply stickers in a clean, controlled environment rather than in direct sunlight or extreme weather.

Can You Put Stickers on Fresh Paint?

Fresh paint may feel dry before it is fully cured. During the curing process, the paint can continue releasing moisture or other compounds that interfere with adhesion.

Applying a sticker too soon may result in bubbling, lifting, or damage when the sticker is removed.

Curing times depend on the type of paint, surface, temperature, humidity, and manufacturer instructions. Follow the paint manufacturer’s full curing guidance rather than assuming that a dry surface is ready.

For valuable walls, signs, vehicles, or equipment, test a small hidden area first.

Why Are the Edges of My Sticker Lifting?

Lifting edges can result from several conditions:

• The surface was dirty or oily

• The material was textured

• The sticker was applied when it was too cold

• Moisture was trapped beneath the vinyl

• The edge was repeatedly rubbed or handled

• Part of the sticker crosses a seam or curve

• The sticker was stretched during installation

• The adhesive is not compatible with the surface

Complex shapes can also contain narrow points that receive more wear than rounded edges. When planning a sticker for equipment, packaging, or frequently handled objects, a smoother outer contour may be more practical than several thin projections.

Can a Sticker Be Removed and Applied Again?

Most adhesive vinyl stickers are intended for one application.

Once removed, the adhesive may contain dust, skin oils, fibers, or fragments from the original surface. The vinyl may also stretch or curl during removal. Even if the sticker attaches again, the second bond may not be as reliable.

For the best result, decide on the position before fully pressing the sticker down.

How Soon Can a New Sticker Get Wet?

Adhesive bonds often develop after application, but the required time varies by material. Avoid assuming that every sticker can be washed or exposed to weather immediately.

Follow the care instructions for the specific sticker. If no instructions are available, keep the applied sticker dry while the adhesive establishes its bond and avoid aggressive washing around the edges.

Outdoor use, dishwasher exposure, hand washing, and occasional water contact are different conditions. Confirm that the sticker material is intended for the actual environment before ordering.

How Can You Test an Unfamiliar Surface?

A small application test is the most dependable way to evaluate an unusual surface.

Apply a sample to a clean section of the actual object. Press it firmly and observe the sticker under realistic conditions. Check the edges, narrow sections, and any areas crossing curves or texture.

If the sticker will be used outdoors, the test should reflect the expected heat, moisture, handling, and sunlight. A sticker that appears secure after a few minutes indoors may behave differently after extended exposure.

Testing is particularly valuable when ordering stickers for containers, powder coated equipment, flexible plastics, silicone products, or textured materials.

Choose the Sticker Based on Where It Will Be Used

Artwork is only one part of a successful custom sticker. The surface and environment are equally important.

Before ordering, consider:

• What material will receive the sticker?

• Is the surface smooth or textured?

• Will it be exposed to water or sunlight?

• Will people handle it frequently?

• Does the sticker need to follow a curve?

• Can the surface be cleaned safely?

Answering these questions helps you choose a format suited to the real application instead of selecting a sticker based only on appearance.

Explore custom sticker options from Rogue Stickers or learn more about custom sticker printing in Austin.


Compare sticker styles and materials and read our surface preparation guide. For questions about a specific application, contact Rogue Stickers before ordering.
Posted on

Custom Stickers Versus Decals: What Is the Difference?

Custom Stickers Versus Decals: What Is the Difference?

If you have searched for a custom logo sticker, a window decal, or vinyl lettering, you have probably noticed that print shops do not always use the same words in the same way. One company may call a printed vinyl graphic a sticker. Another may call nearly the same product a decal.

That can make ordering confusing, especially when two products look similar on a screen but arrive with different layers and require different installation methods.

There is no universal naming rule followed by every printer. In everyday shopping, sticker and decal often overlap. The most useful way to tell them apart is to look at how the product is constructed, how it is applied, and what remains on the surface after application.

For this guide, a sticker means a single printed piece that you peel from its backing and apply directly. A transfer decal means a cut or printed design held together by application tape, which is removed after the design bonds to the surface.

What Is a Custom Sticker?

A custom sticker is usually one piece of adhesive material with artwork printed on its face. You remove the backing, position the sticker, and press the entire piece onto the surface.

The finished sticker may be a circle, square, rectangle, oval, or a custom shape. A custom die cut vinyl sticker follows the outside contour of the artwork, but it still applies as one complete piece.

This format works well when you want something that is easy to hand out, sell, place inside an order, or apply without extra steps. Common uses include:

  1. Water bottles and coolers

  2. Laptops and notebooks

  3. Product packaging

  4. Event giveaways

  5. Artist merchandise

  6. Branded inserts

  7. Toolboxes and equipment

A sticker can have a solid white base, a colored background, or a transparent base. The important point is that the printed material remains one connected piece after it is applied.

What Is a Transfer Decal?

A transfer decal is designed so separate letters, shapes, or parts of a graphic can be installed together in the correct position. It normally arrives in layers.

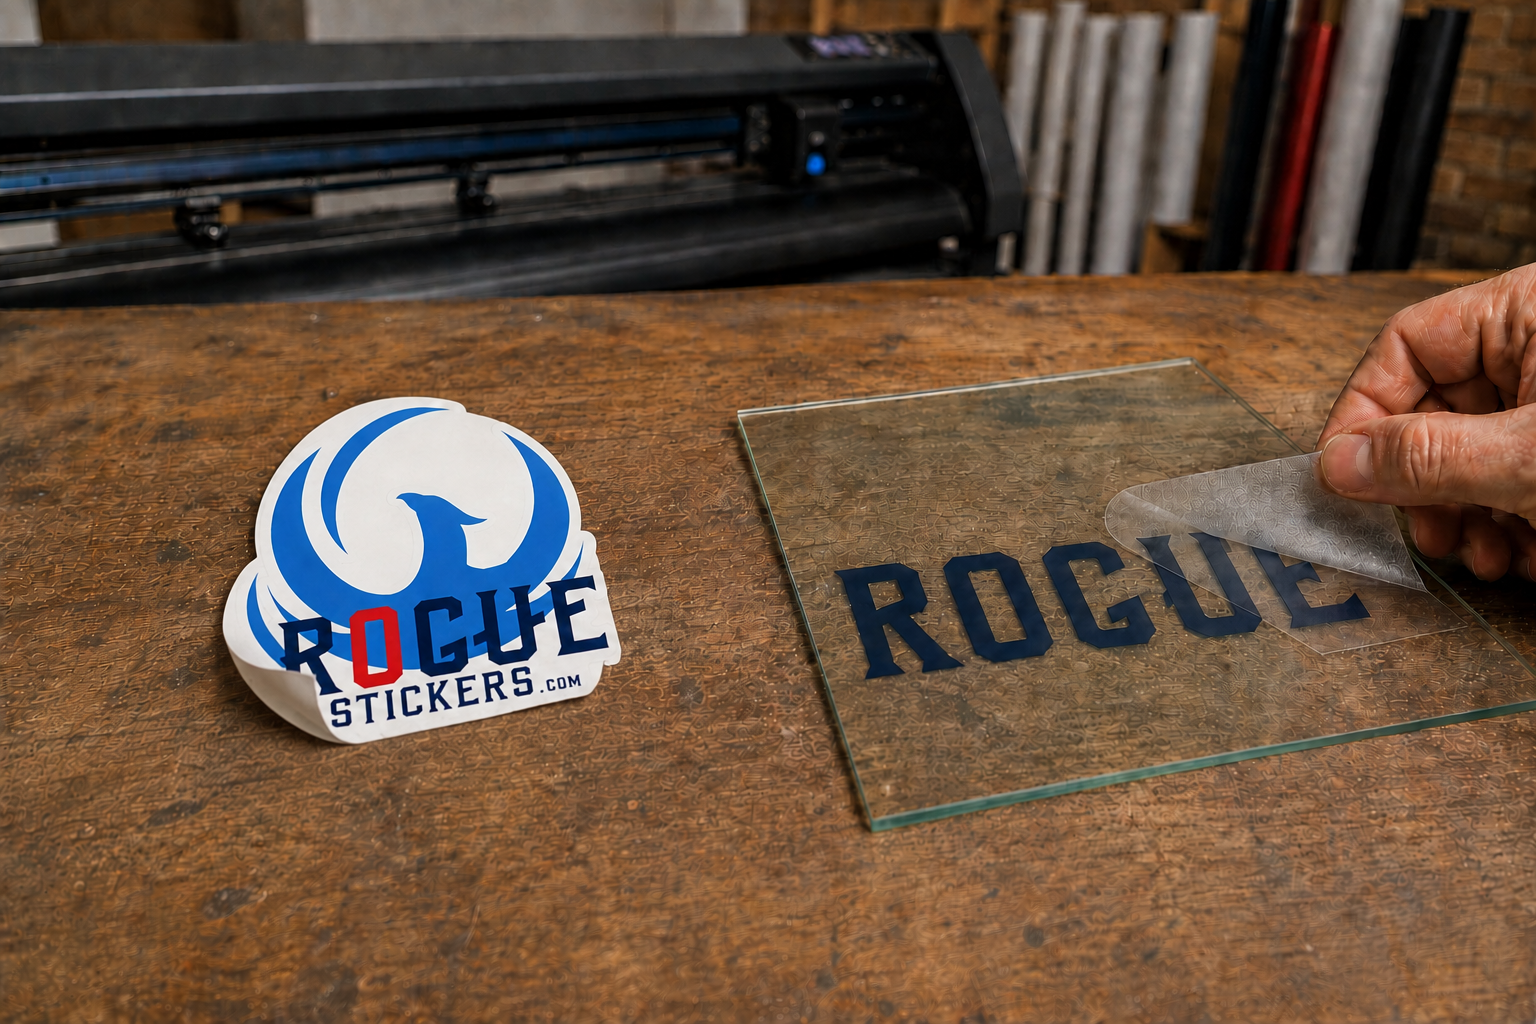
The liner protects the adhesive before installation. The actual vinyl or printed graphic forms the design. Application tape sits over the front and holds every part in alignment while the decal is placed.

After the design bonds to the surface, the application tape is peeled away. Only the intended lettering or graphic remains. There is no surrounding rectangle of sticker material.

This is why transfer decals are often chosen for:

  1. Store hours on glass doors

  2. Business names on windows

  3. Vehicle lettering

  4. Equipment identification

  5. Simple logos on smooth surfaces

  6. Directional signs

  7. Wall lettering made for a suitable wall surface

Rogue Stickers offers both single color die cut transfers and full color die cut transfers. The right version depends on the artwork and the intended appearance.

Are All Decals Transfer Decals?

No. This is where terminology becomes less precise.

Many sellers use decal as a broad word for a durable adhesive graphic, including printed vinyl pieces that apply exactly like stickers. You may see bumper decals, floor decals, wall decals, and window decals that do not use application tape at all.

The product name alone may not tell you what will arrive. Read the description and look for these details:

  1. Does the graphic apply as one complete printed piece?

  2. Does it include application tape?

  3. Will the background material remain visible?

  4. Are individual letters or design elements transferred to the surface?

  5. Is it meant for the exact surface where you plan to use it?

Those answers matter more than whether the product page says sticker or decal.

What Is the Main Visual Difference?

A standard sticker keeps its base material around and between the printed elements. A transfer decal can leave only the design itself on the surface.

Imagine a business name written in individual letters. As a white vinyl sticker, the letters could be printed inside one white rectangle or one custom shaped piece. As a cut vinyl transfer decal, each letter can adhere directly to the window while preserving the spacing of the original design. After the application tape is removed, the glass shows through every open area.

A clear vinyl sticker offers another option. Its transparent material can create a subtle appearance, but clear vinyl still remains between the printed areas. Depending on the artwork, surface color, ink, and lighting, that material may still be visible.

Which One Is Easier to Apply?

For most small projects, a regular sticker is easier. You peel it, place it, and press it down. Careful alignment still matters, but there are fewer layers to manage.

A transfer decal takes more patience. Every element must bond to the application surface before the top tape is removed. Large designs and fine lettering require especially careful pressure and alignment.

Application tape is not decorative packaging. It temporarily keeps the graphic together and helps move it to the final surface. Once the decal has been pressed firmly into place, the tape is removed and discarded.

Whatever format you choose, begin with a clean, dry surface. Dirt, oil, wax, dust, and cleaner residue can interfere with adhesion. Always follow the instructions supplied with the specific product because suitable cleaners, temperatures, and methods can vary by material and surface.

Should You Choose a Sticker or a Decal for a Vehicle?

Either format may be appropriate, but the goal determines the better choice.

A custom sticker can work well for a compact logo, bumper graphic, or promotional design that should apply in one piece. A transfer decal is often the cleaner option for individual lettering, a website address, a unit number, or a logo that should appear without a surrounding background.

Before applying anything to a vehicle, confirm that the material is intended for automotive use and that the paint is sound. Fresh paint, repaired paint, coatings, curves, trim, sensors, and textured plastic can change what is suitable. A large or complex vehicle graphic may be better handled by an experienced installer.

Texas heat and sun also make product selection important, but no responsible printer can promise one universal service life for every vehicle. Exposure, material, installation, maintenance, parking conditions, and surface condition all affect performance.

What Works Best for Storefront Windows?

Transfer decals are a strong choice when you want hours, lettering, or a logo to look as if it was placed directly on the glass. They preserve open space around the design and can produce a clean sign shop appearance.

Printed stickers are useful when the artwork needs a solid background, detailed illustration, photograph, or self contained shape. Clear stickers can work when you want the glass to remain visible, but artwork colors may interact with what is behind the window.

Think about viewing direction before ordering. A graphic applied outside the glass and read from outside is different from one applied inside and read through the glass. Window tint, reflections, interior lighting, and white ink can also change visibility. Tell the printer where the graphic will be installed and from which side it should be read.

Which Format Is Better for Packaging and Giveaways?

Custom stickers are usually the practical choice. They are easy to distribute, simple for customers to use, and familiar at merch tables, markets, festivals, and retail counters.

For an Austin restaurant, brewery, artist, or small business, a die cut sticker can carry a complete logo or illustration in one portable piece. It can be included with an order without asking the customer to follow a transfer process.

Transfer decals make more sense when the intended result is permanent looking lettering or a borderless graphic on a known surface. They are less convenient as a casual giveaway because the recipient needs to understand the layers and application process.

Can a Detailed Design Become a Transfer Decal?

Sometimes, but not every design is a good candidate.

Single color cut vinyl works best with clean shapes, readable lettering, and elements large enough to cut, weed, and transfer reliably. Tiny gaps, delicate lines, distressed textures, and intricate details may need to be simplified.

Artwork with photographs, gradients, shadows, or many colors may require a printed full color transfer product or a standard printed sticker. The best choice depends on the actual artwork, final size, and production method.

Do not assume that removing a background from an image automatically makes it suitable for a transfer decal. The remaining elements still need to survive cutting, handling, and installation.

What Should You Ask Before Ordering?

If a product description is unclear, ask the printer these questions:

  1. Will this apply as one piece or as separate transferred elements?

  2. Does it arrive with application tape?

  3. What material will remain visible after installation?

  4. Is it appropriate for my exact surface and location?

  5. Should it be installed inside or outside the glass?

  6. Is my artwork detailed enough to require printing rather than cut vinyl?

  7. What file type and final dimensions should I submit?

  8. Are there special installation or care instructions?

A clear answer to those questions will prevent most ordering surprises.

The Simple Way to Choose

Choose a custom sticker when you want a complete printed piece that is easy to peel, apply, share, sell, or add to packaging.

Choose a transfer decal when you want letters or graphic elements to remain on the surface without a visible background connecting them.

If the terminology on a product page still feels vague, focus on construction and application. Ask what layers arrive, what remains after installation, and whether the material suits the intended surface.

Sticker versus decal is not merely a vocabulary question. It is a decision about appearance, installation, artwork, and use. Once those four details are clear, choosing the right product becomes much easier.

Compare sticker styles and materials and read our surface preparation guide. For questions about a specific application, contact Rogue Stickers before ordering.
Posted on

How Do You Apply Vinyl Decals Without Bubbles?

How Do You Apply Vinyl Decals Without Bubbles?

How Do You Apply Vinyl Decals Without Bubbles?

Applying vinyl decals sounds easy until you get one crooked, trapped with air bubbles, or stuck halfway before you are ready. The good news is that most vinyl sticker problems come from rushing the install. If you slow down, clean the surface, and use the right method, you can get a smooth decal that looks professional.

Here is a simple step by step guide to applying vinyl decals without bubbles.

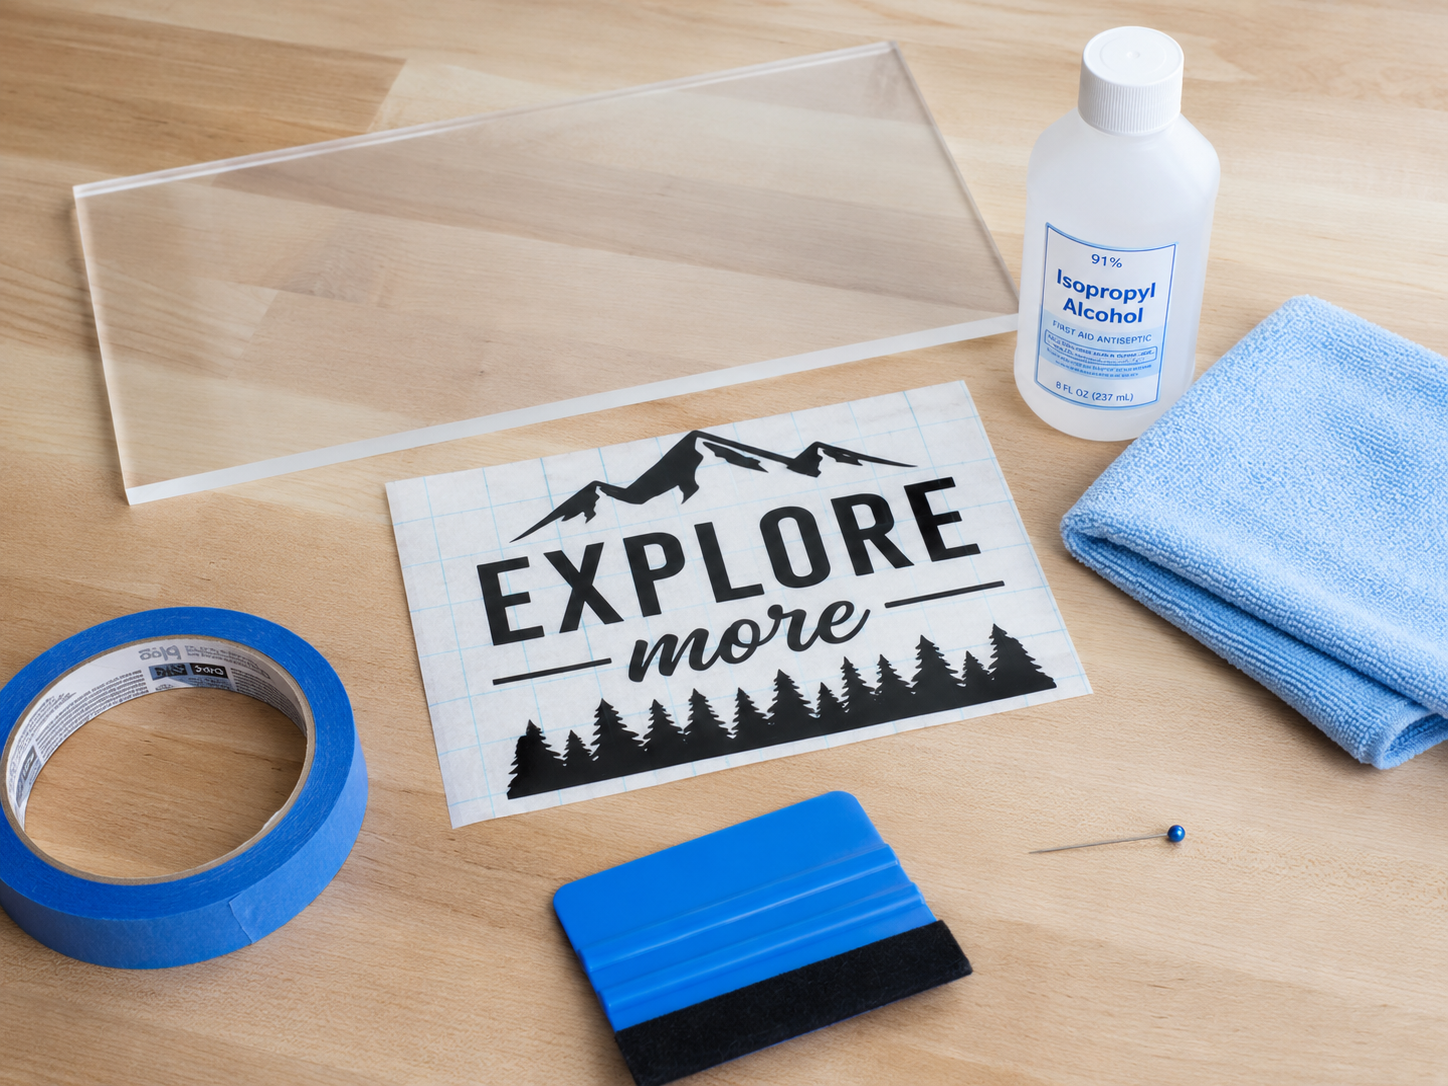
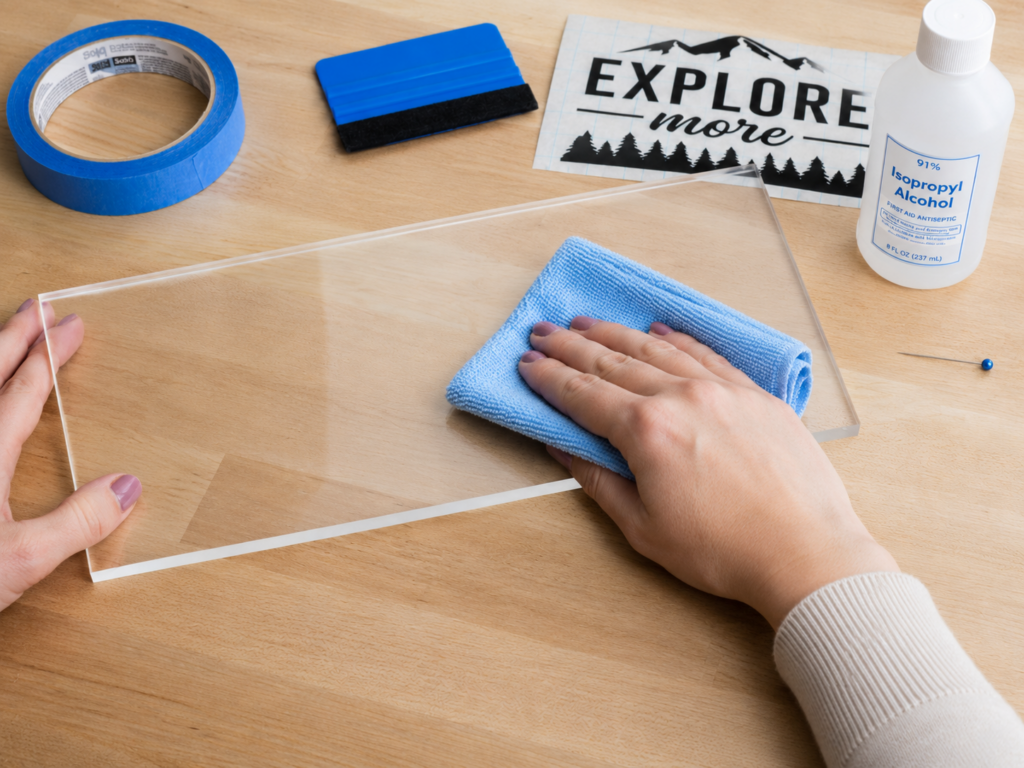
Photo suggestion: Show a clean vinyl decal, squeegee or credit card, masking tape, rubbing alcohol, and a microfiber towel laid out on a table.

What You Need

Before you start, grab a few basic tools:

A vinyl decal
A clean microfiber towel
Rubbing alcohol or surface cleaner
Masking tape or painter’s tape
A squeegee or credit card
A measuring tape if placement matters
A pin or fine needle for small bubbles

You do not need anything fancy. The biggest thing is making sure the surface is clean and dry.

Step 1: Clean the Surface

This is the step most people skip, and it is usually why vinyl bubbles or peels later.

Wipe the area with rubbing alcohol or a cleaner that does not leave an oily residue. Dust, wax, grease, fingerprints, and dirt can all keep the vinyl from sticking flat. After cleaning, dry the area with a microfiber towel.

Do not apply vinyl to a wet, dusty, or freshly painted surface. If paint is new, give it time to fully cure before adding decals.

Photo suggestion: Show someone wiping a window, cup, laptop, car window, or sign surface with a microfiber towel.

Step 2: Position the Decal Before Peeling

Do not peel the backing off yet.

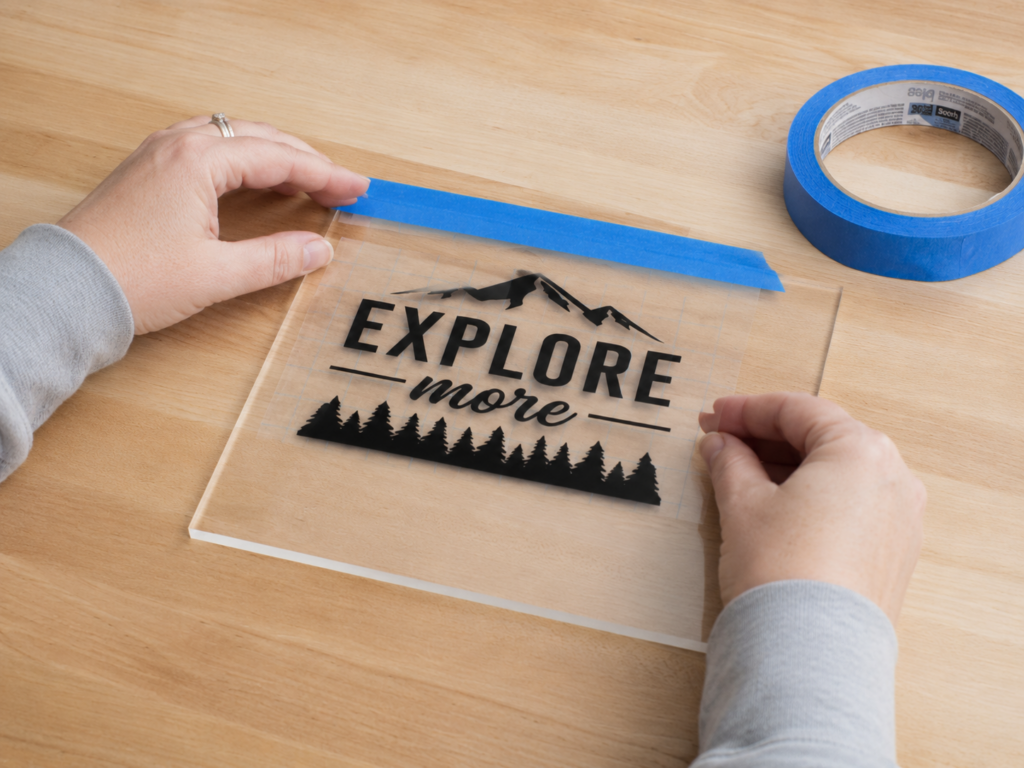
Place the decal on the surface exactly where you want it. Use masking tape to hold it in place. If the decal needs to be centered, measure both sides before installing.

A good trick is to place a strip of masking tape across the top edge of the decal like a hinge. This lets the decal flip up and down while staying lined up.

Photo suggestion: Show the decal taped in place with one strip of painter’s tape across the top.

Step 3: Use the Hinge Method

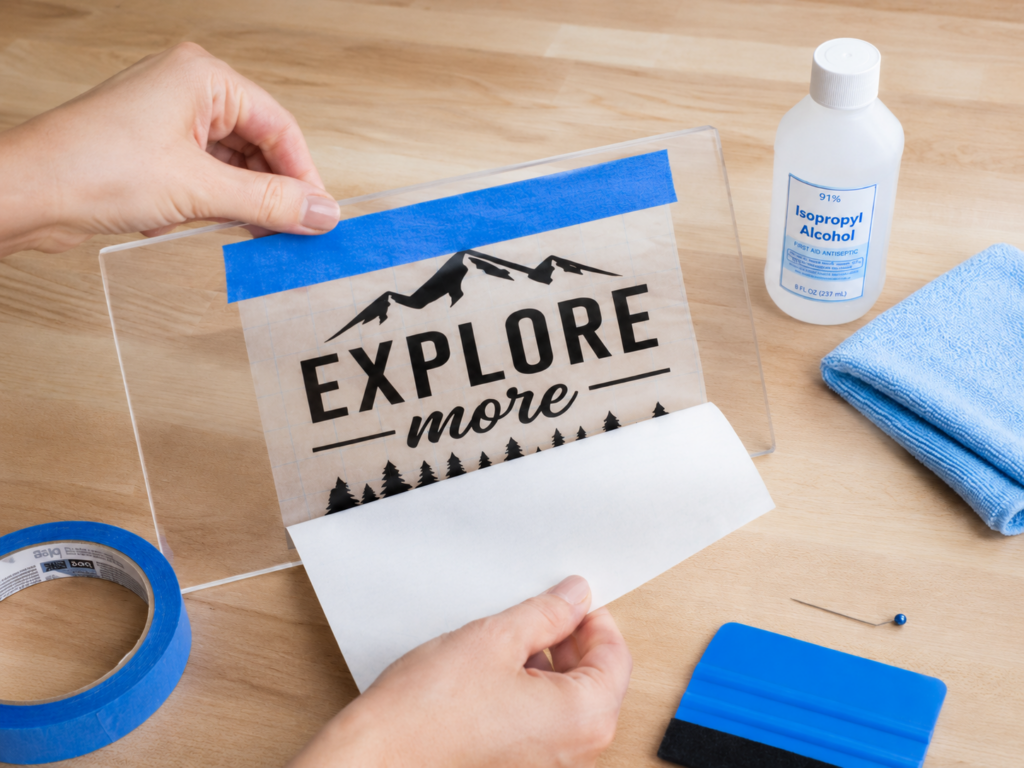
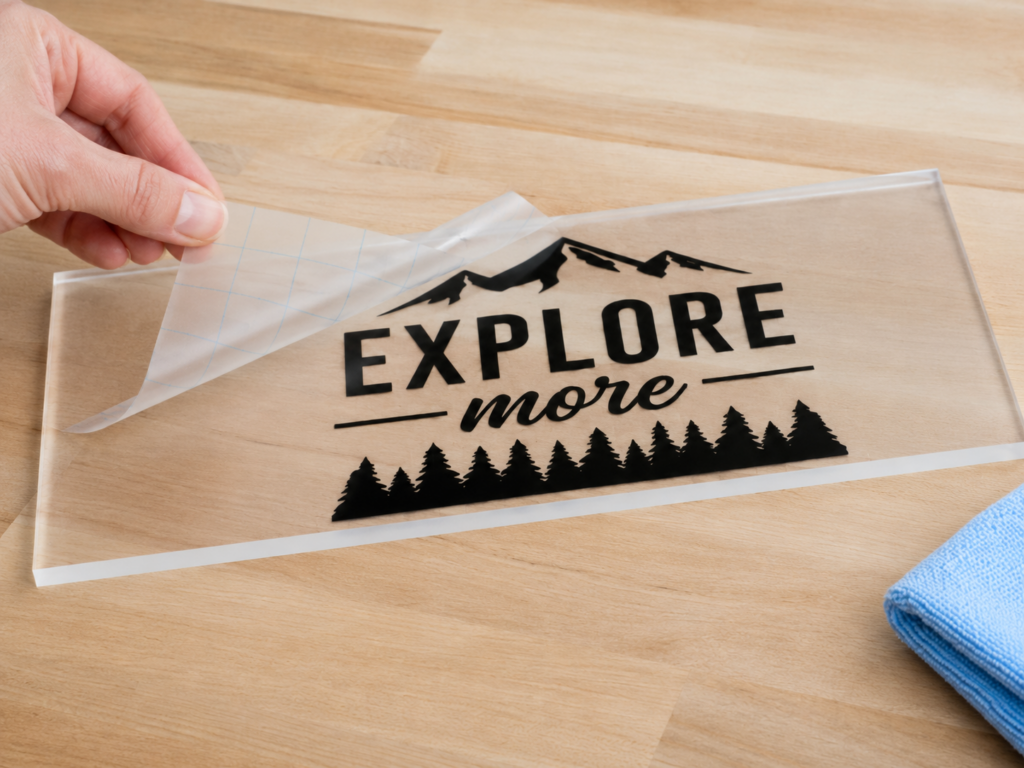
Once the decal is taped in place, flip it upward like opening a door or notebook. Slowly peel the backing paper away from the vinyl.

Be careful not to let the sticky side touch the surface yet. If the design has small letters or thin details, make sure they stay attached to the transfer tape and do not lift with the backing paper.

If a piece does lift, lay the backing paper back down and rub over that area with your squeegee.

Photo suggestion: Show the backing paper being peeled away while the top tape hinge keeps the decal lined up.

Step 4: Apply Slowly From the Center Out


Now comes the important part.

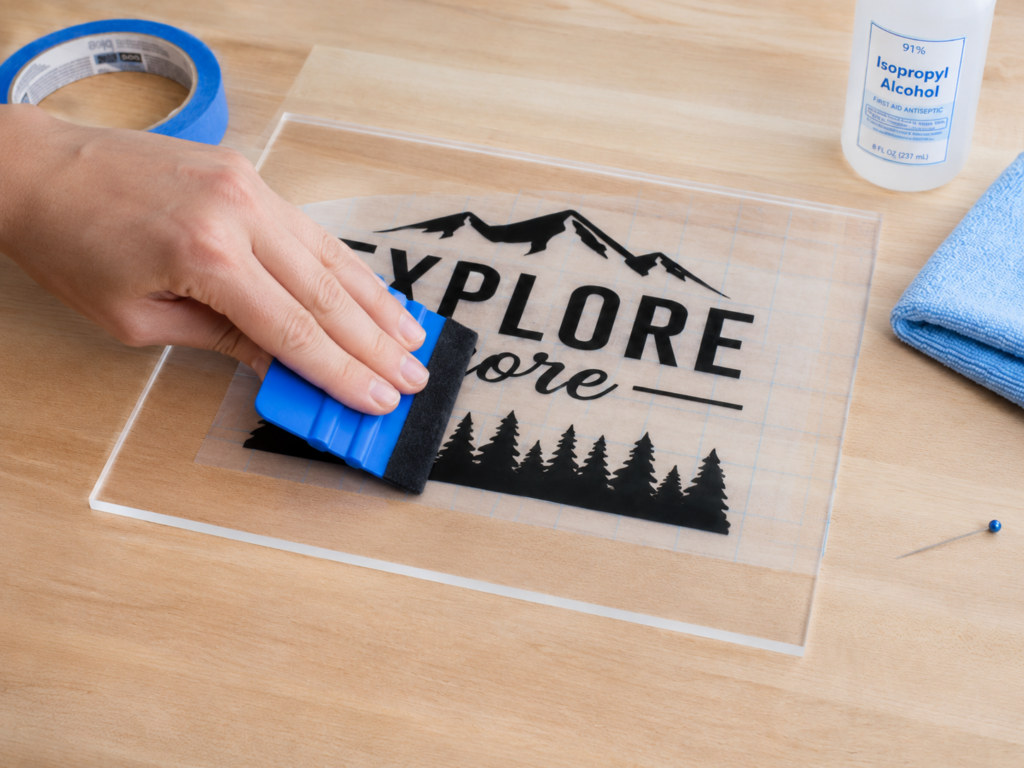
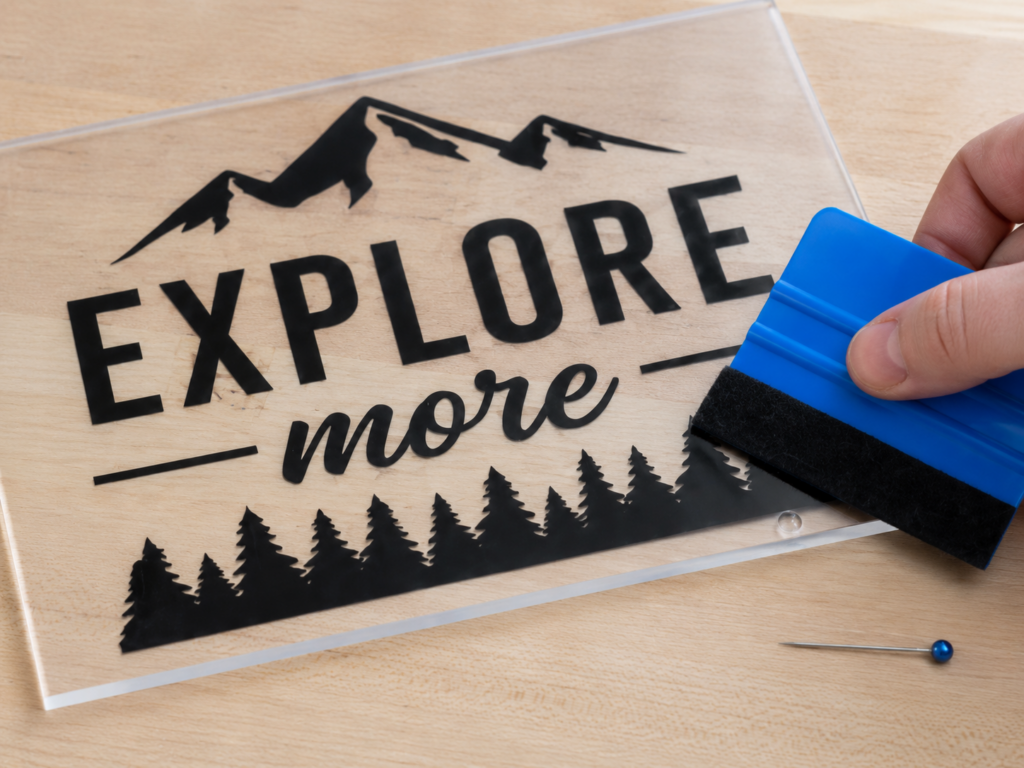
Hold the decal slightly above the surface and begin applying it from the top or center. Use your squeegee or credit card to press the decal down slowly. Work from the center outward, pushing air toward the edges.

Do not slap the whole decal down at once. That is how bubbles get trapped.

Use firm, even pressure. Think of it like smoothing out a screen protector. Slow and steady gives you the cleanest result.

Photo suggestion: Show a hand using a squeegee to press the vinyl down from the center toward the edges.

Step 5: Burnish the Decal

After the decal is on the surface, rub over the entire design with your squeegee. This is called burnishing. It helps the vinyl adhesive bond to the surface.

Pay extra attention to corners, small letters, and thin lines. These are the areas most likely to lift if they are not pressed down well.

Photo suggestion: Close up of a squeegee pressing over the full decal before the transfer tape is removed.

Step 6: Peel Off the Transfer Tape

Slowly peel the transfer tape back at a sharp angle. Do not pull straight up. Pull it low and flat against the surface.

If part of the vinyl lifts with the transfer tape, stop. Lay the tape back down and rub that section again with your squeegee. Then continue peeling slowly.

This step should not be rushed. A slow peel gives the vinyl time to stay stuck where it belongs.

Photo suggestion: Show the transfer tape being peeled back low and flat while the decal stays on the surface.

Step 7: Remove Small Bubbles

Even with a careful install, you may see a few tiny bubbles. Do not panic.

Small bubbles often disappear on their own after a day or two, especially on smooth surfaces. If you have a larger bubble, gently push it toward the edge with your finger or squeegee.

If it will not move, use a fine pin to make a tiny hole at the edge of the bubble. Then press the air out slowly. Do not cut the vinyl or poke a large hole. One tiny pin prick is enough.

Photo suggestion: Close up of a small bubble being pushed toward the edge with a finger or squeegee.

Common Mistakes to Avoid

Do not apply vinyl on a dirty surface.
Do not rush the install.
Do not apply in extreme heat or cold.
Do not touch the sticky adhesive with your fingers.
Do not peel the transfer tape straight up.
Do not install over wax, oil, or heavy texture.

Vinyl likes smooth, clean surfaces. Glass, metal, plastic, sealed wood, laptops, cups, cars, and signs are all common surfaces that work well when cleaned properly.

Final Tip

The easiest way to apply vinyl decals without bubbles is to prep the surface, tape the decal in place, and apply it slowly with pressure from the center outward. Most bubbles happen when air gets trapped under the vinyl, so your goal is to push that air out before the decal fully sticks.

Take your time, use the hinge method, and do not rush the peel. A clean install is not hard. It just takes a little patience.

Compare sticker styles and materials and read our surface preparation guide. For questions about a specific application, contact Rogue Stickers before ordering.
Posted on

What Is the Difference Between Die-Cut and Kiss-Cut Stickers?

What Is the Difference Between Die-Cut and Kiss-Cut Stickers?

What Is the Difference Between Die-Cut and Kiss-Cut Stickers?

When ordering custom stickers, one of the most common questions is: What’s the difference between die-cut and kiss-cut stickers?

Both options can look professional, hold up well, and work great for branding, packaging, events, giveaways, laptops, water bottles, and retail products. The main difference comes down to how the sticker is cut and how the backing paper is finished.

At Rogue Stickers, we print custom stickers for businesses, brands, artists, events, and anyone who wants high-quality stickers that look sharp and last. Here’s a simple breakdown to help you choose the right style for your next order.

What Are Die-Cut Stickers?

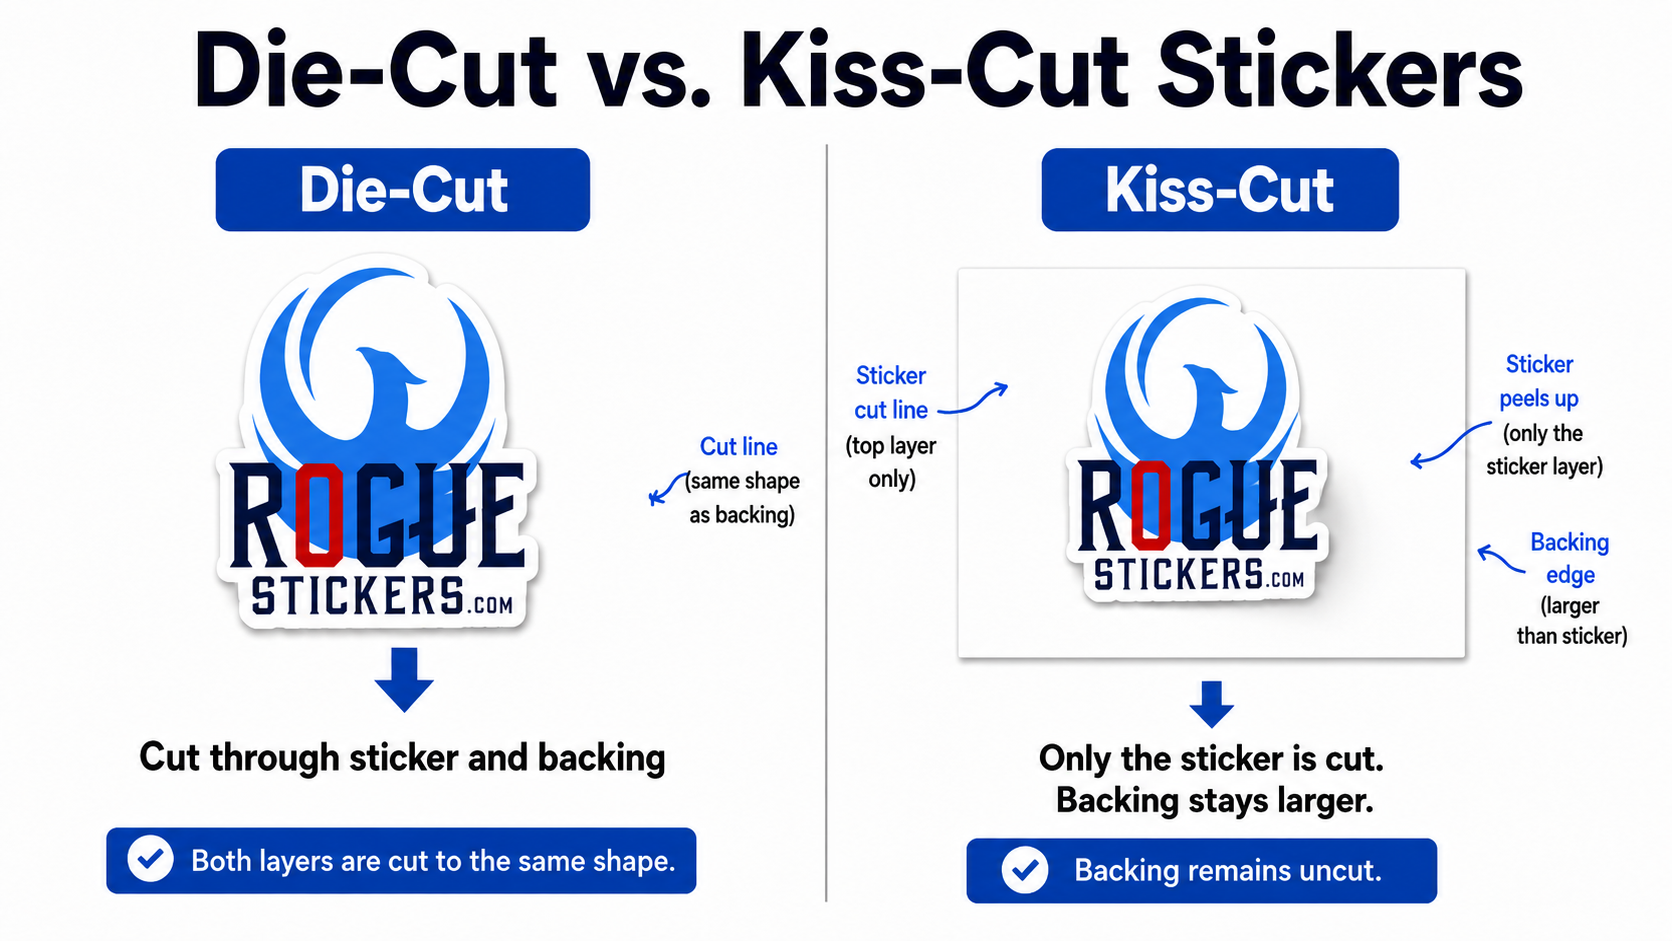
Die-cut stickers are cut all the way through the sticker material and backing paper into the exact shape of your design.

That means if your logo is shaped like a circle, badge, star, mascot, wordmark, or custom outline, the final sticker itself follows that shape. There is no extra square or rectangle backing around the design.

For example, if you order a sticker of your business logo, a die-cut sticker will be trimmed around the outside edge of that logo. The sticker and the paper backing will both be the same custom shape.

What Are Kiss-Cut Stickers?

Kiss-cut stickers are cut through the sticker layer only, while the backing paper stays larger and uncut.

The sticker itself can still be a custom shape, but it sits on a larger sheet or backing. You peel the sticker away from the backing when you are ready to use it.

For example, your logo may be cut into a custom shape, but it could sit on a square, rectangle, or circle backing. The cut line only “kisses” the top sticker layer without cutting all the way through the paper backing.

Die-Cut vs. Kiss-Cut Stickers: The Main Difference

The easiest way to remember it:

Die-cut stickers are cut all the way through the sticker and backing. Kiss-cut stickers are only cut through the sticker layer.

Both options can use the same printed design. Both can be made in custom shapes. Both can be durable and professional. The difference is mostly in the backing and how the sticker is presented, peeled, and handled.

When Should You Choose Die-Cut Stickers?

Die-cut stickers are a great choice when you want the cleanest, most premium-looking sticker.

They are popular for:

Custom logo stickers
Brand giveaways
Retail sticker packs
Laptop stickers
Water bottle stickers
Car window stickers
Event merch
Small business branding
Outdoor promotional stickers

Die-cut stickers look polished because the finished piece is shaped exactly like the artwork. They are easy to hand out, easy to sell, and feel like a finished product.

If you want a sticker that looks great on its own, die-cut is usually the best choice.

When Should You Choose Kiss-Cut Stickers?

Kiss-cut stickers are a great choice when you want easier peeling, extra backing space, or more protection around the sticker.

They are popular for:

Sticker sheets
Small detailed designs
Product labels
Packaging stickers
Promotional handouts
QR code stickers
Instructional stickers
Stickers with delicate edges
Designs with thin lines or small details

Because the backing stays larger, kiss-cut stickers are often easier to peel. This makes them a smart option for detailed artwork, small stickers, or stickers that will be applied quickly in bulk.

The extra backing can also be used for branding, instructions, social media handles, QR codes, or a short message.

Which Sticker Style Looks More Professional?

Both die-cut and kiss-cut stickers can look professional when they are printed well.

Die-cut stickers usually feel more premium as a standalone product because the full sticker is cut into the exact shape of the design. This makes them great for selling, handing out, or including with customer orders.

Kiss-cut stickers can feel more practical and user-friendly because the extra backing makes them easier to peel and handle. They are especially useful for sticker sheets, product labels, and designs with fine details.

The best option depends on how you plan to use the sticker.

Are Die-Cut Stickers More Durable Than Kiss-Cut Stickers?

The cut style does not usually determine durability. Sticker durability depends more on the material, ink, adhesive, and finish.

A die-cut sticker and a kiss-cut sticker can be made from the same vinyl, printed with the same ink, and finished with the same protective layer. In that case, they should perform very similarly once applied.

If you want stickers for outdoor use, water bottles, coolers, cars, equipment, or packaging, focus on quality materials and professional printing.

Which One Is Better for Business Stickers?

For most business logos, die-cut stickers are the best choice when you want a clean promotional sticker people will keep, use, or share.

They are great for:

Coffee shops
Breweries
Restaurants
Gyms
Outdoor brands
Apparel brands
Bands
Events
Local businesses
E-commerce packaging

However, kiss-cut stickers may be better if you are using them as product labels, packaging seals, QR code stickers, or anything that needs to be peeled quickly and applied in volume.

Which One Is Better for Sticker Sheets?

Kiss-cut is usually the better choice for sticker sheets.

With kiss-cut sticker sheets, multiple sticker designs can be cut into one sheet while the main backing stays intact. This makes it easy to peel each sticker individually.

Sticker sheets are great for artists, schools, events, planners, packaging inserts, and branded merch.

Which One Should I Order?

Choose die-cut stickers if you want:

A clean custom shape
A premium finished look
A sticker that is easy to hand out or sell
Logo stickers
Brand merch
Laptop, bottle, or car stickers

Choose kiss-cut stickers if you want:

Easy peeling
Extra backing around the sticker
Sticker sheets
Small or detailed designs
Product labels
Packaging stickers
Room for extra branding on the backing

Still unsure? A simple rule is: die-cut for the best-looking individual sticker, kiss-cut for easier peeling or sticker sheets.

Final Answer: Die-Cut vs. Kiss-Cut Stickers

The difference between die-cut and kiss-cut stickers is simple. Die-cut stickers are cut through both the sticker and backing paper into the shape of your design. Kiss-cut stickers are cut only through the sticker layer, leaving the backing paper intact.

Both are excellent options for custom stickers. Die-cut stickers are ideal for premium logo stickers, giveaways, and merch. Kiss-cut stickers are ideal for sticker sheets, detailed artwork, labels, and easy application.

At Rogue Stickers, we help brands, businesses, artists, and events create custom stickers that look professional, feel high quality, and are made for real-world use.

Whether you need die-cut stickers, kiss-cut stickers, sticker sheets, product labels, or promotional stickers, Rogue Stickers can help bring your design to life.

Compare sticker styles and materials and read our surface preparation guide. For questions about a specific application, contact Rogue Stickers before ordering.
Posted on

Why choose Eco-Solvent Ink

Eco solvent ink is used in wide format printing on compatible materials such as adhesive vinyl. It is one part of the print system, alongside the printer, media, profiles, drying process and protective finish.

How the print system works

The printer and ink must be suitable for the material being printed. A supported media profile sets print conditions for that combination. Clear artwork and suitable settings help reproduce text, lines and color, but the ink name alone does not guarantee a particular result.

Durability depends on more than ink

Outdoor exposure, rubbing, moisture, the adhesive and any protective layer affect a finished sticker. Ask about the construction intended for your use rather than assuming every eco solvent print is suitable for every environment.

What eco does and does not mean

The term eco solvent does not establish that a product is chemical free, non-toxic, recyclable or environmentally certified. Handling, ventilation and safety requirements come from the specific ink’s safety documentation and equipment instructions. Customers should not infer a certification from the name.

Color and finish still need review

A screen emits light; printed vinyl reflects it. Material color, matte or gloss finishes and lighting can change appearance. Review your proof for layout and obvious color errors, and discuss important brand colors before production.

Prepare your order

Supply clear artwork at its intended print size and explain where the stickers will be used. Our artwork preparation guide covers file setup. For a particular material or exposure, contact Rogue Stickers before ordering.

Compare sticker styles and materials and read our surface preparation guide. For questions about a specific application, contact Rogue Stickers before ordering.
Posted on

Choosing a Custom Sticker Printer in Austin

Choosing a custom sticker printer in Austin starts with your artwork and where the stickers will be used. Compare the ordering process, materials, proofing and timing so the product fits the job rather than choosing on a headline alone.

Match the product to the application

Business logo giveaways, packaging labels, event handouts and transfer decals do different jobs. Explain the surface, size, environment and expected handling. A sticker intended for a smooth package may not suit a textured cooler or a compound vehicle curve.

Compare proofing and artwork support

Ask what the proof shows and when approval is needed. At Rogue Stickers, customers review a digital proof before printing. Check the design version, dimensions, spelling, cut shape, border and artwork placement. Important corrections belong before approval, not after production.

Check the total at your quantity

Compare like for like sizes, materials and finishes. The minimum is 50 stickers per item unless the product page lists a higher minimum. Quantity pricing can change the unit price, so review the total for the number you actually need.

Be clear about deadlines

Proofing, production and carrier transit are separate stages. Ask whether your deadline is realistic before ordering, and do not treat a shipping estimate as a guaranteed arrival date. Delayed approval or artwork changes can affect the schedule.

Know who to contact

Rogue Stickers is based at 2307 Thornton Rd, Unit 201, Austin, Texas 78704. Contact our team at info@roguestickers.com for artwork, product and order questions. Confirm any collection arrangements before visiting.

Start with a specific question

Bring your artwork, approximate dimensions, quantity, intended surface and deadline. That gives the print team useful information to assess the project. Compare custom sticker styles, read our ordering FAQ, or contact Rogue Stickers.

Compare sticker styles and materials and read our surface preparation guide. For questions about a specific application, contact Rogue Stickers before ordering.
Posted on

The Ultimate Guide to Custom Stickers in 2026: What to Know Before You Order

Stickers have never been more popular — or more powerful. Whether you’re a small business owner looking to boost brand recognition, an artist turning your designs into merchandise, or just someone who wants to personalize their gear, custom stickers are one of the most cost-effective and versatile tools at your disposal.

At Rogue Stickers, we’re an Austin, Texas print shop dedicated to producing high-quality custom stickers with precision die-cut designs, fast turnaround, and free shipping nationwide. Everything we make is produced right here in Texas — and in this guide, we’re breaking down everything you need to know to make your next sticker order a success.


What Are Custom Stickers, and Why Do They Matter?

Custom stickers are adhesive-backed graphics printed and cut to your unique design. They range from simple circle stickers to complex character die-cuts, and they serve an enormous variety of purposes: branding, marketing, decoration, gifting, packaging, and personal expression.

In 2026, the custom sticker market is booming. Driven by a surge in e-commerce, creator economy growth, and the enduring power of tactile marketing, businesses and individuals alike are ordering more stickers than ever before. The self-adhesive label and sticker market is projected to reach $57 billion globally by 2026 — and that momentum is showing no signs of slowing down.

The bottom line: stickers are small, but their impact is anything but.


Types of Custom Stickers (And When to Use Each One)

Choosing the right sticker type for your project makes a huge difference in how your final product looks and performs. Here’s a breakdown of the most popular options:

1. Die-Cut Stickers

Die-cut stickers are cut precisely to the outline of your design — no square or circle background, just the shape of your artwork. They look polished, professional, and eye-catching. These are ideal for logos, mascots, and any design where you want the sticker to feel like a true piece of art rather than a label.

At Rogue Stickers, every die-cut is crafted with meticulous attention to detail. You’ll receive a digital proof before anything goes to print, so you know exactly what you’re getting.

2. Circle & Square Stickers

Classic vinyl circle and square stickers are workhorses. Made from high-quality 6mil vinyl, they’re perfect for product labels, promotional giveaways, and simple branding. Their uniform shape makes them easy to apply and stack.

3. Bumper Stickers

Want maximum visibility? Our bumper stickers are made from Oracal 4mil removable vinyl, designed to look great on vehicles without damaging the paint when removed. They’re available in standard sizes and require a minimum order of 50 units — ideal for organizations, campaigns, bands, and businesses.

4. Clear Stickers

Clear stickers give your design a “floating” look — no white background, just your artwork on a transparent film. They’re available in circles, squares, and custom die-cuts, making them a sleek, professional option for product packaging and branding.

5. Kiss-Cut Sticker Sheets

Kiss-cut stickers are individually cut on a larger sheet of vinyl — so the sticker peels off easily while the sheet stays intact. Printed on premium 4mil Oracal Vinyl, these sheets are fun to collect, easy to distribute, and perfect for promotional giveaways or building a fanbase.

6. Die-Cut Transfer Stickers

Our full-color die-cut transfer stickers are made from 3mil Oracal colored vinyl and cut precisely to your design. They’re great for vehicle decals, windows, and smooth surfaces where you want a clean, seamless look. Application is simple: peel, place, rub, remove the masking layer.

7. Character Die-Cuts

A Rogue Stickers exclusive — turn yourself, your friends, your team, or your mascot into a collectible, shareable die-cut sticker. These are wildly popular for events, merch drops, and social media marketing.


What Makes a Great Sticker? (Material & Durability)

Not all stickers are created equal. Here’s what separates a quality sticker from one that fades, peels, or cracks within weeks:

Vinyl construction is the gold standard for durability. Vinyl stickers are waterproof, UV-resistant, and built to last on outdoor surfaces like water bottles, cars, and outdoor signage.

Eco Solvent ink — which Rogue Stickers uses — is known for its longevity and weather resistance. It bonds deeply into the vinyl substrate, producing colors that stay vivid even after extended outdoor exposure.

Thickness matters. Our stickers range from 3mil to 6mil vinyl depending on the product type, giving you the right balance of flexibility and durability for your use case.

The result? Stickers that are tough, weather-proof, and built to represent your brand for the long haul.


2026 Custom Sticker Trends to Know

The sticker industry moves fast. Here are the biggest design and material trends shaping 2026:

Holographic & Iridescent Finishes — Prismatic, color-shifting stickers have exploded in popularity. Holographic die-cuts are especially hot for limited-edition product drops and premium merch.

Y2K Nostalgia — Retro aesthetics inspired by the early 2000s — chunky fonts, holographic hearts, pixel art — are having a major moment across every category.

Minimalist & Clean Design — After years of visual overload, consumers are gravitating toward simple serif fonts, white space, and calm, purposeful layouts. Clean doesn’t mean boring; it means confident.

Bold Maximalism — Simultaneously, bold colors, neon grunge, and punk-inspired designs are making a statement. Stickers are one of the first places counterculture shows up.

Character-Led Branding — Mascots, illustrated characters, and brand personalities are increasingly being turned into collectible sticker series — a powerful way to build community around your brand.

Eco-Conscious Materials — Sustainability is no longer optional. Consumers — especially millennials and Gen Z — actively seek out brands that make environmentally responsible choices, including in their packaging and promotional materials.

Whatever style you’re going for, Rogue Stickers can bring your vision to life.


How to Order Custom Stickers: A Step-by-Step Overview

Ordering from Rogue Stickers is straightforward:

  1. Choose your sticker type — die-cut, circle, bumper, clear, kiss-cut, transfer, or character.
  2. Submit your design — Upload your artwork directly to our website.
  3. Receive your online proof — We’ll send you a digital proof before printing so you can approve the design or request changes.
  4. We print & ship — Once approved, we get your stickers printed and shipped at warp speed — with free shipping nationwide.

No hidden fees. No surprises. Just great stickers, fast.


Tips for Designing Your Custom Sticker

Want to get the most out of your order? Keep these design best practices in mind:

  • Use vector files when possible. SVG, AI, or EPS files scale infinitely without losing quality. If you only have a raster image, we offer vectorization services.
  • Leave bleed space. Add a small buffer around your design’s edges to account for minor cutting variation.
  • For sticker sheets: Each sticker should be at least 1″ in size and spaced 0.5″ apart for clean kiss-cutting.
  • Consider your surface. Bumper stickers and transfer decals behave differently than standard vinyl. Choose the product type that matches where you’ll be applying it.
  • Keep it readable at size. A great design looks good at thumbnail scale. If your text is too small or detailed, it may not translate well when printed small.

Why Order From Rogue Stickers?

There are plenty of sticker printers out there. Here’s what makes Rogue Stickers different:

✅ Made in America — Everything is printed right here in Austin, Texas.
✅ Precision die-cutting — Your design is cut exactly to spec, every time.
✅ Online proofing — You approve before we print. No guessing.
✅ Fast turnaround — We ship at warp speed.
✅ Free shipping — Nationwide, no minimums on shipping costs.
✅ Eco Solvent ink — Durable, weather-resistant, long-lasting color.

We also offer custom apparel through our sister shop, Satellite Printlab, including embroidery, DTG, and DTF printing — perfect if you want your stickers and merch to match.


Frequently Asked Questions

Are your stickers waterproof?
Yes. Our vinyl stickers are fully waterproof and UV-resistant, making them suitable for outdoor use, water bottles, vehicles, and more.

What’s the minimum order quantity?
Minimums vary by product. Bumper stickers require a minimum of 50; clear stickers require a minimum of 100. Die-cut stickers and most other products have their own minimums listed on the product pages.

Do you ship outside the US?
We currently ship free nationwide across the United States.

Can I see a proof before my order ships?
Absolutely — every order includes an online proof for your approval before we go to print.

What file formats do you accept?
We recommend vector formats (AI, SVG, EPS, PDF) for the sharpest results, but we can also work with high-resolution raster files (PNG or TIFF at 300 DPI or higher).


Ready to Stick Your Brand Everywhere?

Whether you’re ordering 50 bumper stickers for your next campaign or 500 die-cut stickers for a product launch, Rogue Stickers has you covered. Our Austin-based team is ready to turn your design into something people will actually want to put on their stuff.

Browse Our Full Sticker Catalog →
Start Your Custom Order Today →


Rogue Stickers — Custom Stickers, Made in Texas. Fast Shipping. Free Nationwide.

Compare sticker styles and materials and read our surface preparation guide. For questions about a specific application, contact Rogue Stickers before ordering.
Posted on

6 Mil Vinyl Stickers: Feel, Handling and Uses

Why 6 Mil Vinyl Stickers Are Better | RogueStickers.com

A thicker vinyl sticker can give a logo or illustration a substantial feel in the hand. Here is what a 6 mil specification tells you, what it leaves out, and how to decide whether the construction suits your project.

Understand the measurement

Six mil means 0.006 inch. It is a thickness measurement, not a material grade or a promise of outdoor life. Ask whether the specification includes the face film, adhesive and any protective laminate. Comparing different measurements can be misleading.

Where a substantial feel can help

Logo giveaways, artist merchandise and hand applied labels may benefit from material that feels easy to handle. A sticker with more body can be easier to position without accidentally folding it. The shape, size and liner also affect handling, so thickness is only one part of the experience.

What thickness does not guarantee

A thicker film does not automatically have stronger adhesive, better UV resistance or better performance on textured surfaces. Those qualities depend on the film, adhesive, ink, protective layers and installation. A smooth, clean, compatible surface matters even when the sticker feels sturdy.

Check the real application

Describe where the sticker will go, how it will be handled and whether it will face sunlight or moisture. Do not choose a general purpose sticker for a demanding surface based only on its thickness. Test a sample when the application is unfamiliar.

Compare your options

Our 3 mil versus 6 mil comparison explains why construction matters. Explore custom vinyl sticker styles and contact us if you need help choosing a material for a specific use.

Compare sticker styles and materials and read our surface preparation guide. For questions about a specific application, contact Rogue Stickers before ordering.
Posted on

Why Quality Stickers Matter More Than You Think

Why Quality Stickers Matter More Than You Think

Custom stickers are everywhere on laptops, water bottles, packaging, storefronts, and cars. But not all stickers are created equal. If you’re using cheap, low-quality stickers, you’re not just saving money—you could be hurting your brand.

At Rogue Stickers, we believe your stickers should work as hard as you do.


First Impressions Stick (Literally)

https://customstickers.com/cdn/shop/products/laptopstickercopy.jpg?v=1745608836
https://m.media-amazon.com/images/I/81q2v7Kt6PL._AC_UF350%2C350_QL80_.jpg

Your sticker is often the first interaction someone has with your brand. A high-quality sticker instantly communicates professionalism, durability, and attention to detail.

Low-quality stickers?
They peel, fade, and look cheap—fast.

Why it matters:

  • Crisp print = stronger brand recognition
  • Clean cuts = more professional appearance
  • Premium finish = higher perceived value

👉 A great sticker doesn’t just represent your brand—it elevates it.


Durability That Matches Your Lifestyle


https://m.media-amazon.com/images/I/81mafgMXIbL._AC_UF894%2C1000_QL80_.jpg https://i.etsystatic.com/5291827/r/il/c68a42/790527769/il_1080xN.790527769_hry8.jpg

Whether your stickers are hitting the streets, the lake, or your packaging, durability is everything.

High-quality vinyl stickers are built to handle:

  • UV exposure (no fading in the Texas sun)
  • Water (perfect for coolers, boats, and bottles)
  • Scratches and wear

Cheap stickers crack, fade, and fall apart—sometimes within days.

Pro tip: If your sticker can’t survive a weekend at the lake, it’s not doing its job.


Strong Adhesion Without the Mess

https://ahhgela.com/cdn/shop/articles/Anime_Decal_Instructions_1_1024x662.jpg?v=1612024788 https://m.media-amazon.com/images/I/61gIKoR7EJL._AC_UF894%2C1000_QL80_.jpg https://dejpknyizje2n.cloudfront.net/blog/extra/72b7b6c5fb604edd8ac930212ad33e34.jpg

A quality sticker sticks where it should—and only where it should.

Premium adhesive means:

  • Easy application (no bubbles or wrinkles)
  • Strong hold on multiple surfaces
  • Clean removal without sticky residue

This is especially important for:

  • Retail products
  • Promotional giveaways
  • Vehicle decals

Bad adhesive = bad experience. And people remember that.


Better Stickers = Better Marketing


https://m.media-amazon.com/images/I/81gNW3qIAqL._AC_UF894%2C1000_QL80_.jpg https://machinestudio.com/cdn/shop/articles/GuerillaMarketing.jpg?v=1687396763

A great sticker doesn’t just sit there it travels.

People put high-quality stickers on:

  • Laptops
  • Water bottles
  • Cars
  • Coolers

That turns every customer into a walking billboard for your brand.

Here’s the difference:

  • Cheap sticker → thrown away
  • Quality sticker → kept, shared, and displayed

That’s long-term, organic marketing you don’t have to pay for again.


Precision Die-Cutting Makes All the Difference


https://d2ngzhadqk6uhe.cloudfront.net/samedayru/images/products_gallery_images/same-day-custom-contour-cut-sticker-labels_1732587745895.jpg

Details matter especially when it comes to your logo.

High-quality stickers feature:

  • Exact contour cuts
  • Smooth edges
  • No fraying or misalignment

This ensures your design looks exactly how it was intended.


Why Businesses Choose Rogue Stickers

At RogueStickers.com, we don’t cut corners—we cut clean edges.

We focus on:

  • Premium vinyl materials
  • High-resolution printing
  • Long-lasting durability
  • Clean, professional finishes

Whether you’re a small business, a brand, or just someone who wants their stickers to last, quality makes the difference.


Final Thoughts

A sticker might seem like a small detail but it carries your brand everywhere it goes.

If you want people to take your brand seriously, your stickers need to reflect that.

Invest in quality. It sticks.


Compare sticker styles and materials and read our surface preparation guide. For questions about a specific application, contact Rogue Stickers before ordering.